Week 10 to 14 has been about a new and a very interesting project. It’s about interactions, it’s about creating or making a wearable signifying the interaction, its about making something different, it’s about explaining emotions through the interaction and depicting the same in a model or wearable.
So the first topic was : what’s an interaction? Interaction to me means contact , it means any kind of communication between 2 or more people. It can be termed as a reciprocal action or influence.Interaction also means communication or direct involvement with someone or something.
And the second topic was : what’s a wearable? Something that you can wear through, be it in a form of clothing , jewellery , wearable of materials explaining something, something you can touch or feel or keep in which expresses something.
To start with , our project was about designing a wearable that expresses your interaction with no limitations, as it could be a working model, could be something more meaningful, something depicting more about emotions and feelings of the particular interaction or could be abstract too.
Summary in short for all the work done in week 10-14 for this project:
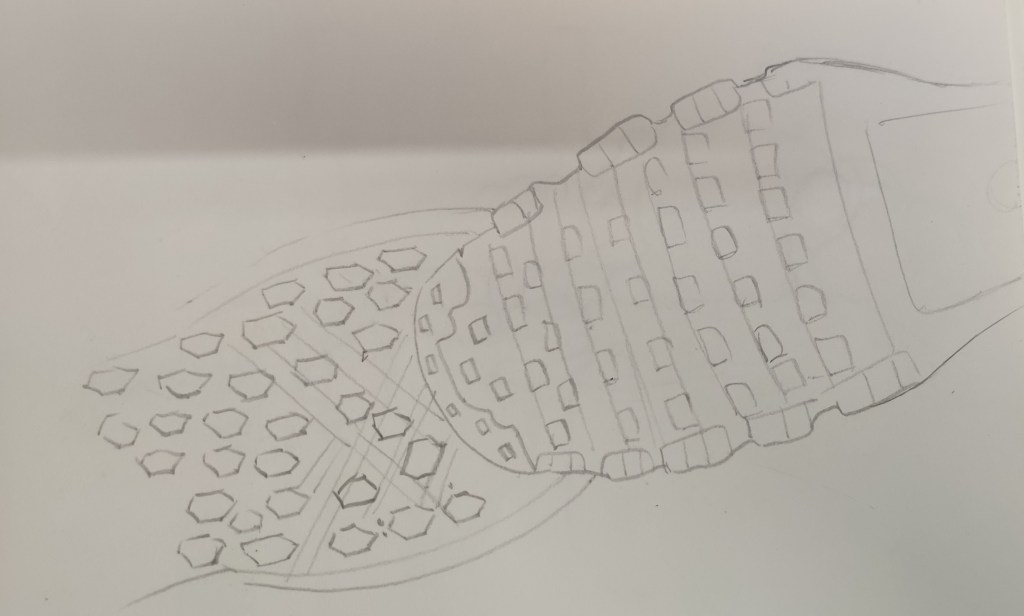
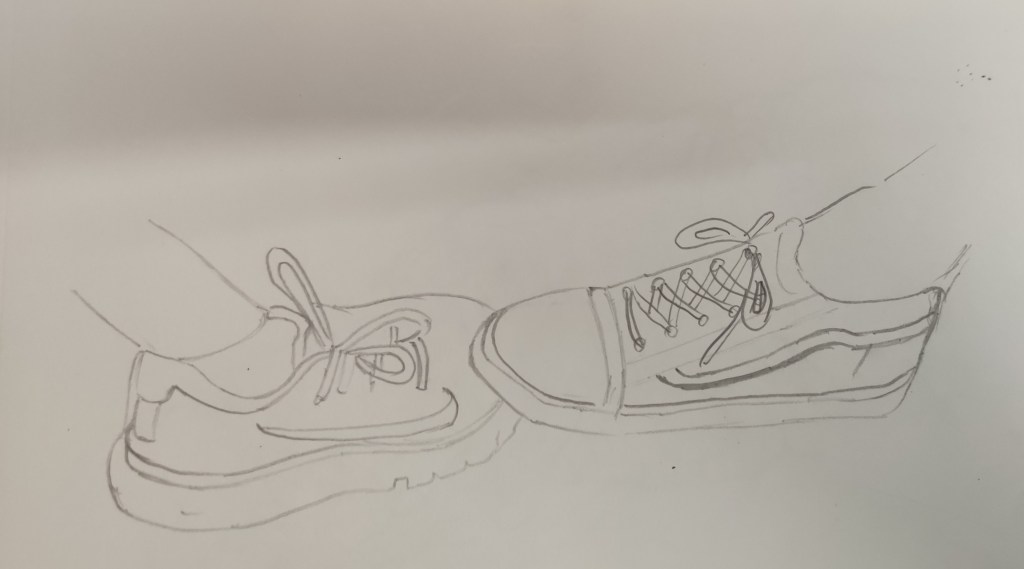
So the first week ( week10) was about thinking of an interaction. something which was different than the usual. We started of with a set of ideas in mind. The first task was to have 5 interactions in total, then to sketch all 6 of them from 6 different sides each.
The 5 interactions we had in mind and sketched were;
– The Stepping on the foot


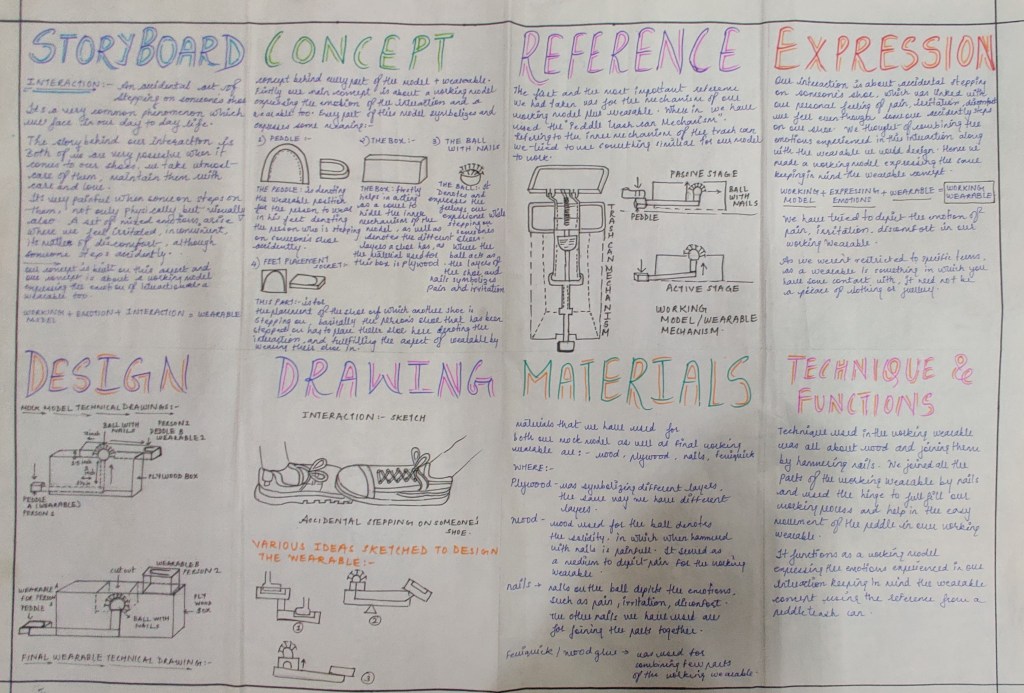
-The first formal meet handshake interaction

– The interaction of sharing a water bottle


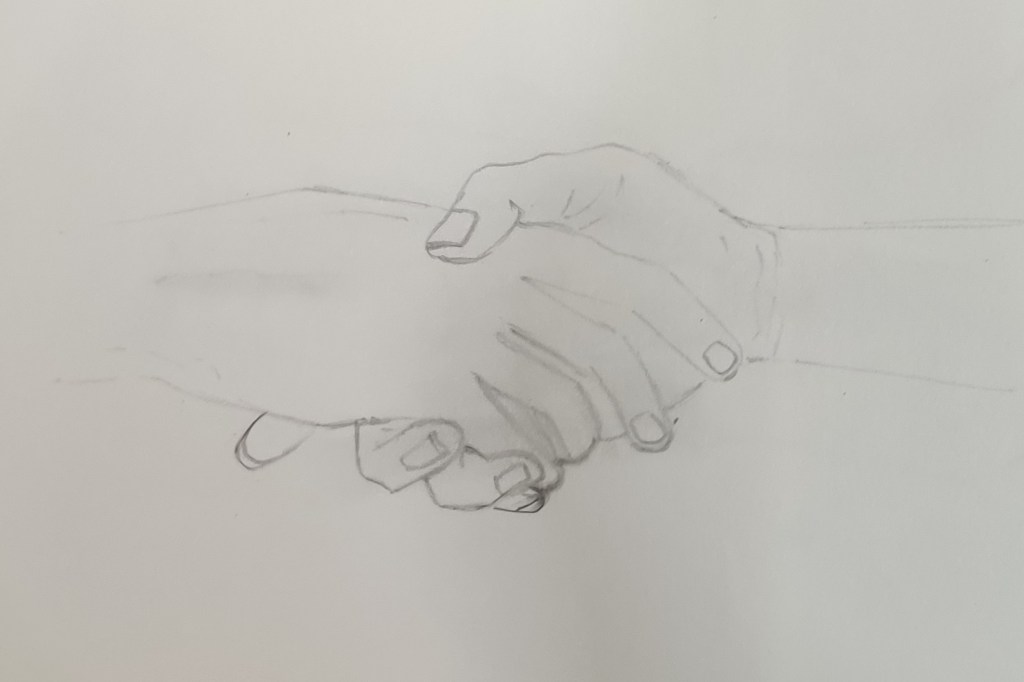
– The interaction of a bro fist which friends do
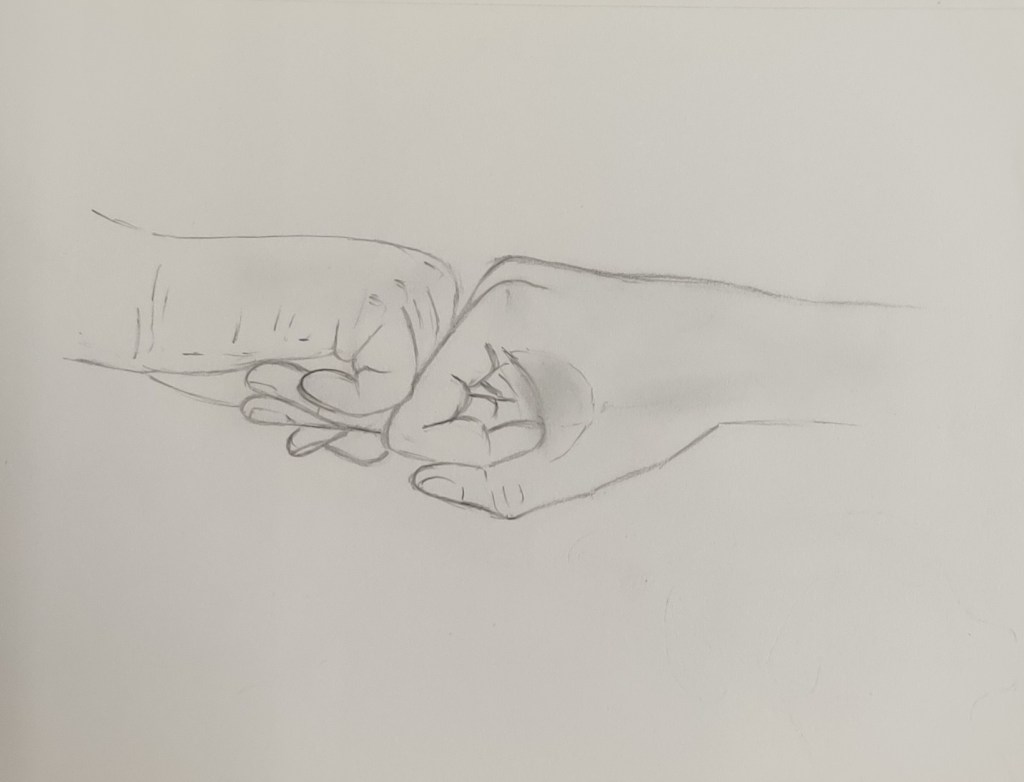


– The interaction of touching the door handle at once to open or close it at the same time.

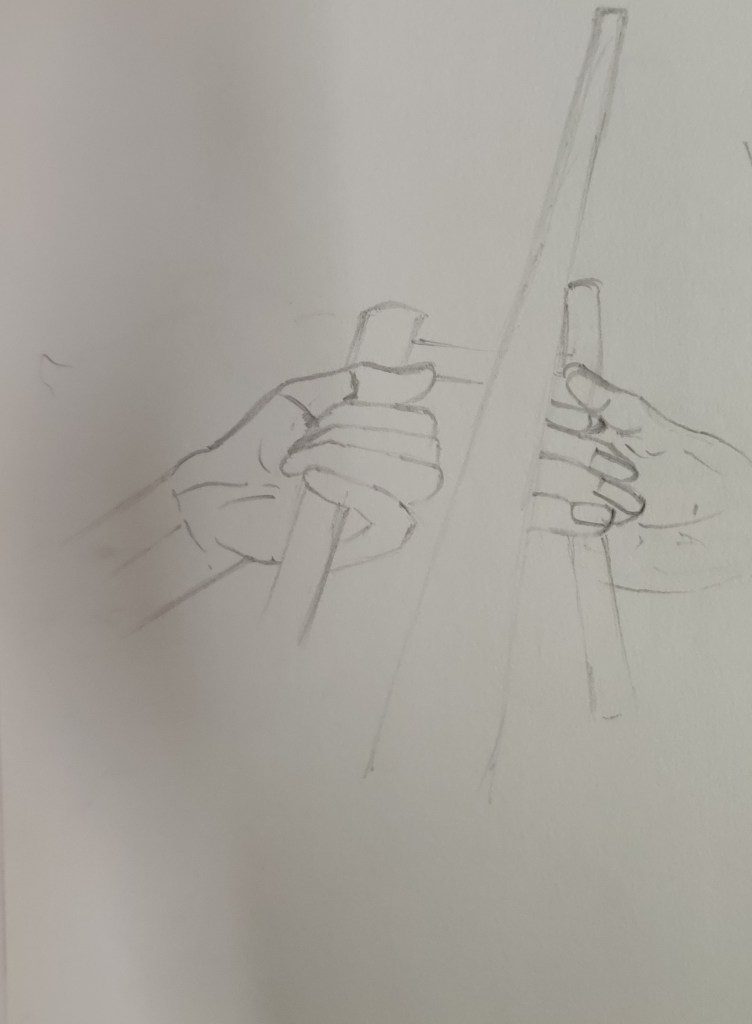
We then thought of finalizing the accidental stepping on the foot interaction as it seemed to be different from the rest we had drawn and thought, and wouldn’t be a very common interaction.
Our next task was to brainstorm ideas for designing a wearable and finalizing one.
The next week (week 11) was about finalizing our ideas for the wearable, we then had to finalize the designs and start working towards making several mock up models to reach to a final one.
We then decided on a final design and started listing materials we would need for making the mock model or wearable as well as for the final model. We needed to have a rational behind what materials we were using and why? We were pretty much sorted by then but were having a few doubts which could have been a hurdle while working further.


The week after (week 12) was first about discussing our ideas and showing our sketches and work done so far to sir, get a few reviews and suggestions, we then had quite a brainstorming with sir related to the problems and errors that could have been created further, and post this discussion we were a lot more clearer about our ideas and could solve all the odds identified till now on paper and visually, but the real challenge was to be understood only when we start working physically and have an hands on experience.


The next half of our class was about making our mock model which was out of plywood and few parts of wood.
As we were instructed that our mock model material has to be the same as the one we would use for our final wearable and model. We faced quite a few problems while making our mock model but ultimately could make a prototype to explain our basic concept.
images of our mock model


The week thereafter (week 13) was about reviewing our mock model from sir , it was then when we sat down and explained the problems which we were facing while making the same to which he explained us the solution by understanding the problem by itself and finding an appropriate solution too. He helped us to think in the right direction to find a solution. He also guided us and told us to make a few valid corrections which would change the make of the model as well as the looks. We had to change a few placement changes to get the working well and to get the reasoning behind it right.
The last week ( week14) was about making our final model , which was a working model + a wearable explaining the emotion behind our interaction.
We used all our final materials , got everything on place, kept all the changes suggested in mind and implementing them appropriately .
Overcame all the issues and finally made a perfect working model wearable. We also had to make a complete documentation on a newsprint sheet covering all the topics of this project and pen them down for presentation.
Images of final working wearable:


Complete documentation of our project:
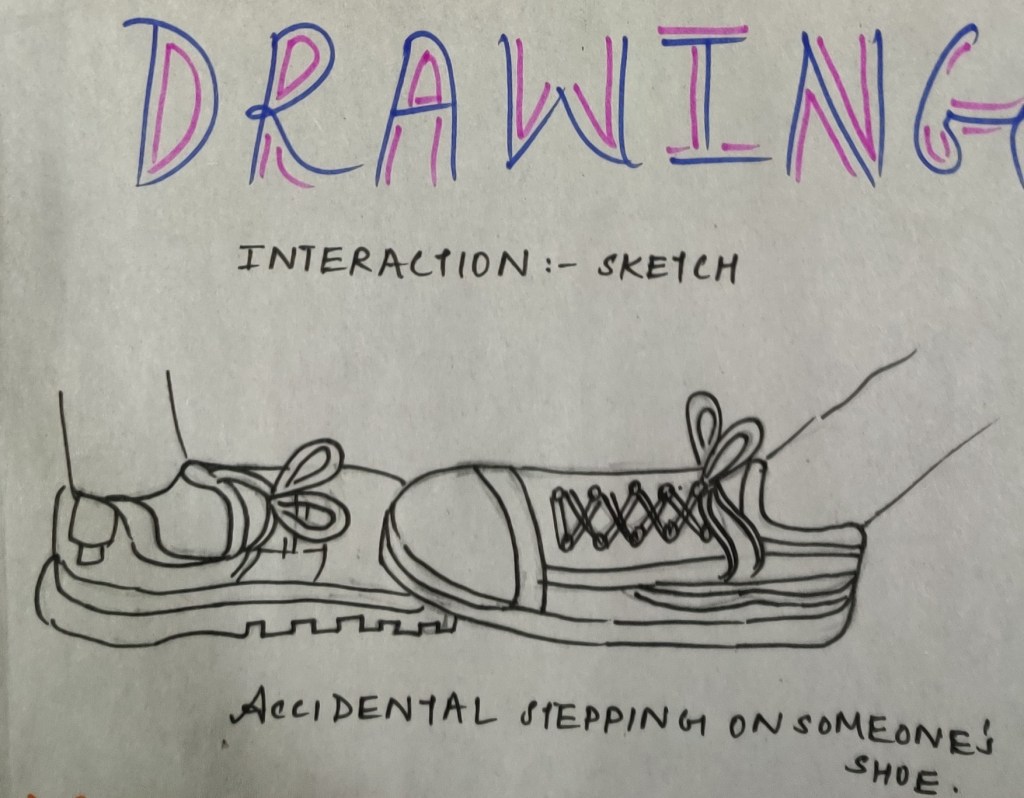
- INTERACTION:
Our interaction is about an accidental stepping on someone’s shoe.
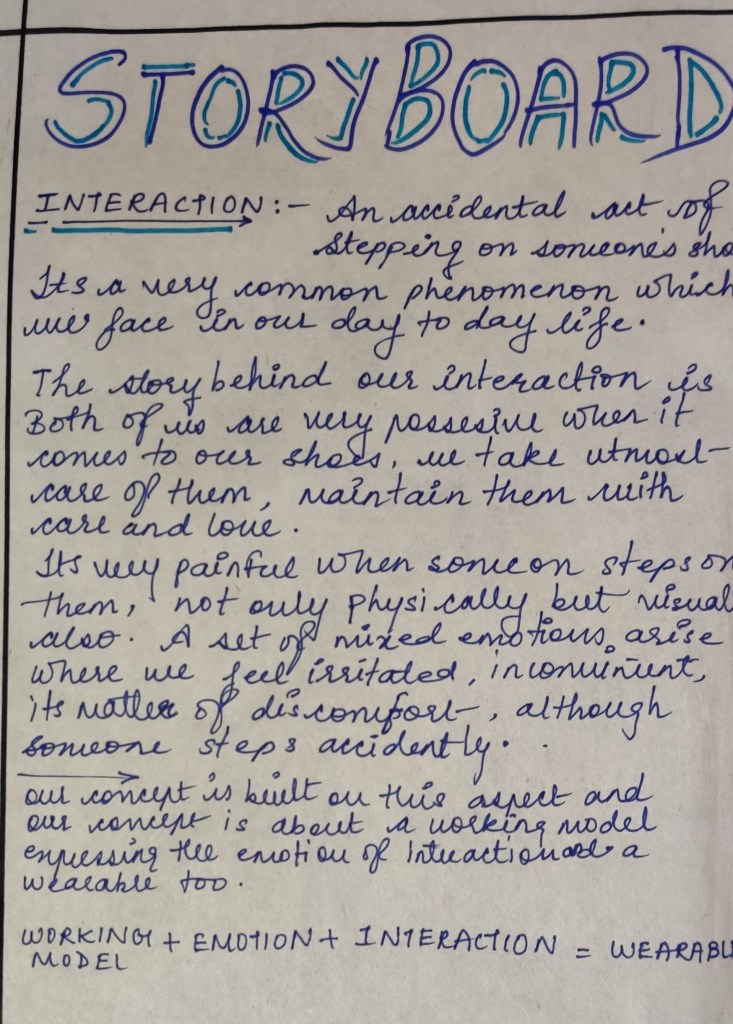
- STORYBOARD:
The story behind our interactions is as both Shubh and I sat to work on this project he happened to accidently step on my shoe and my first reaction was ‘ Shubh these are my new white shoes pls be be careful’ and it started from their when this interaction striked my mind and we thought that this interaction could be one of our 5 interactions.
This story goes same with both of us as, both of us are very possessive about our shoes and are very particular when it comes to maintaining and keeping them in a good condition. It very irritating and painful not only physically but visually when someone steps on our shoe although it happens accidentally.
Then is when we thought we would take this interaction further to design a wearable .
- CONCEPT:
Our concept is based on a working model which expresses the emotions experienced in our interaction along with a wearable.
WORKING MODEL+ WEARABLE+ EMOTIONS+INTERACTION= WORKING WEARABLE.
We have designed a wearable where we can wear in our feet , at the same time , we express the emotion through a working model.

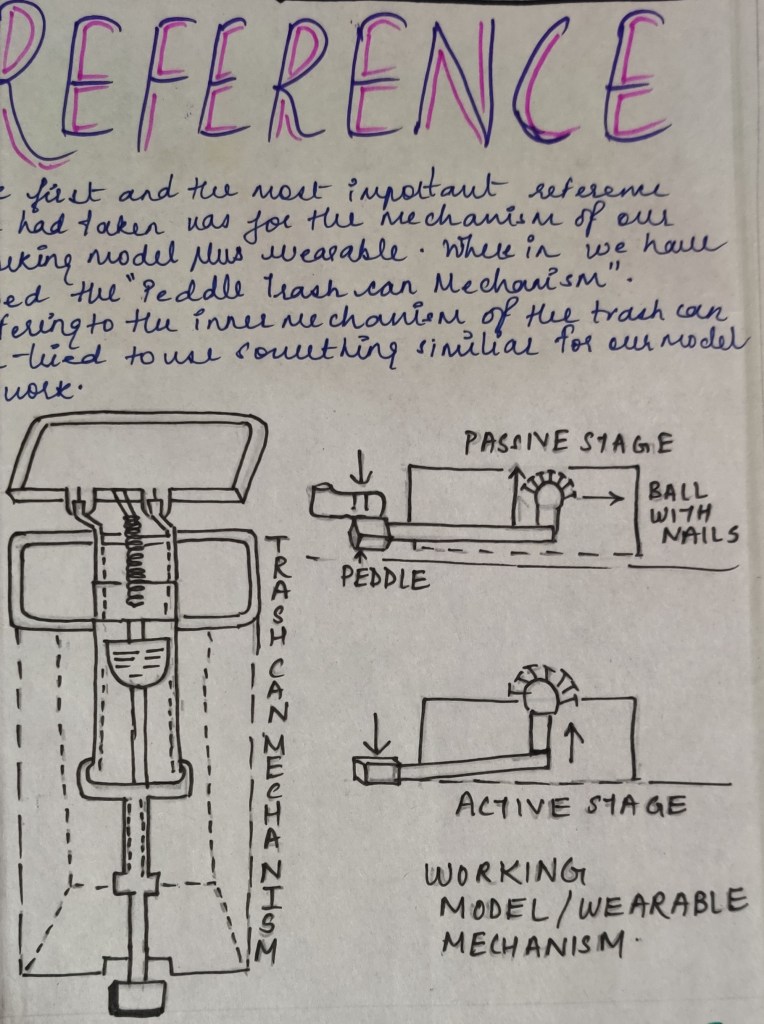
- REFERENCE:
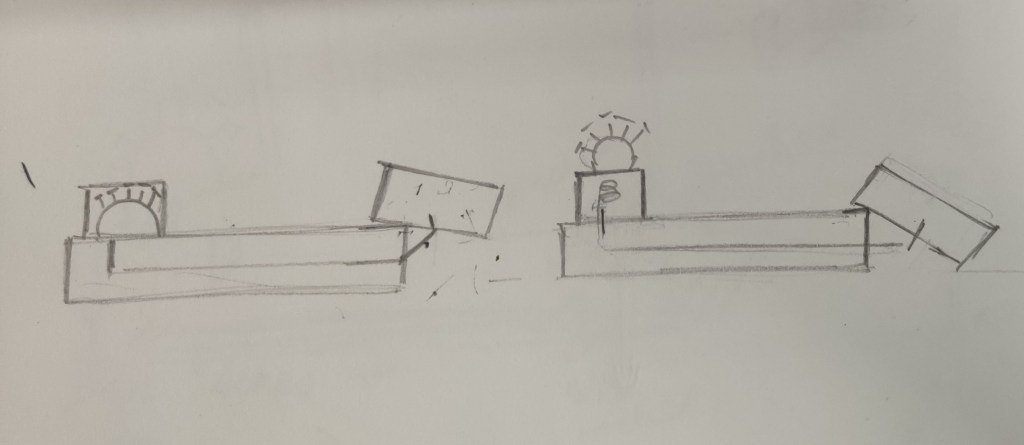
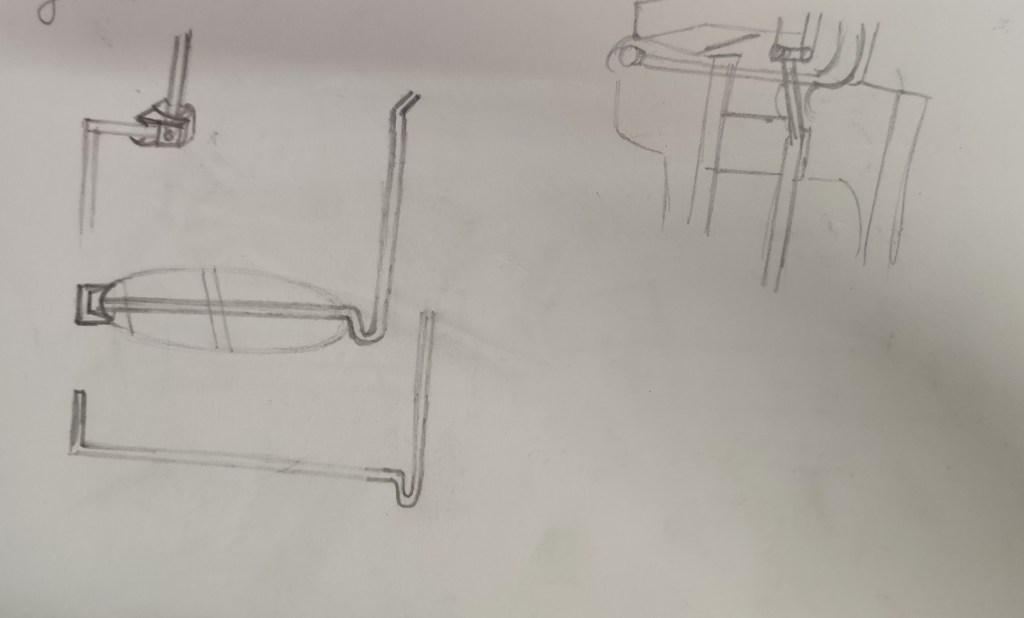
We took the peddle trash can mechanism as reference for our working wearable wear we used similar concept for the working of our model .
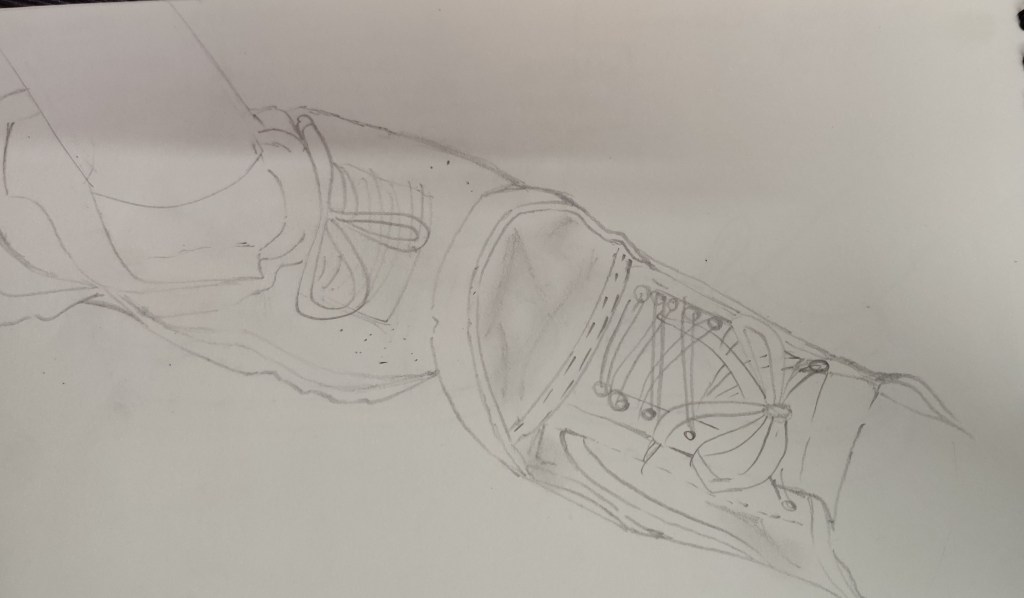
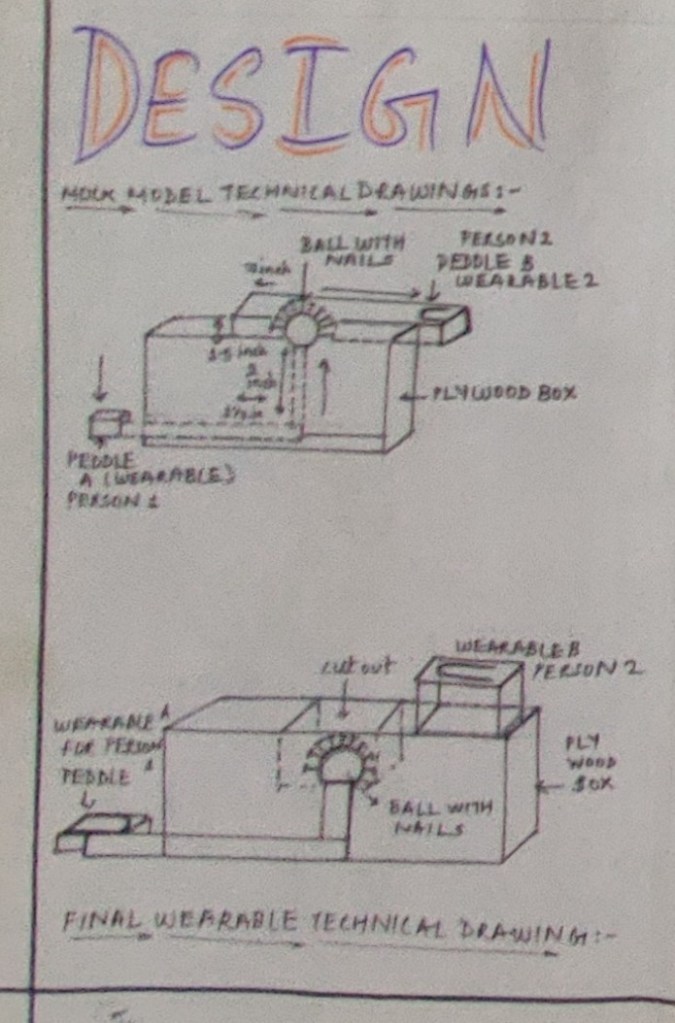
- DESIGN :
Design of the working wearable is below
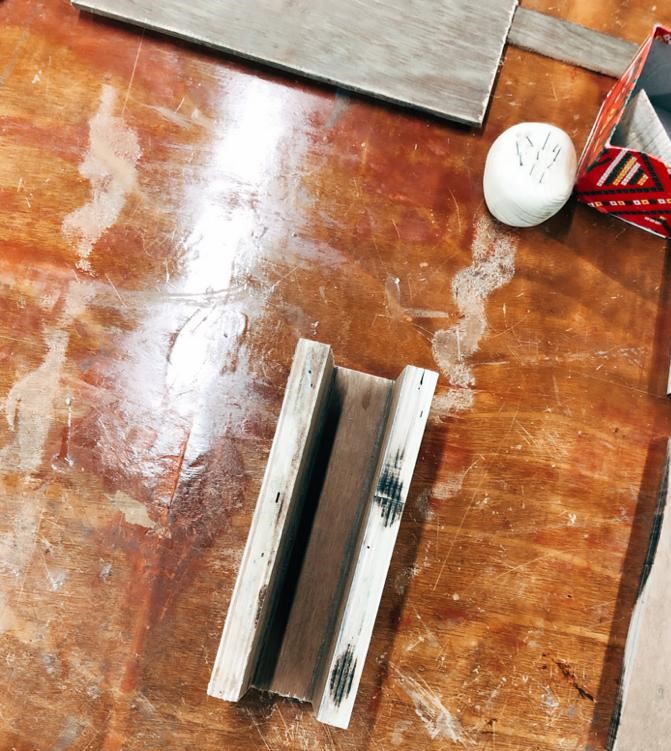
- MATERIALS USED:
Materials used to make both the mock model as well as final working wearable were:
Wood – symbolizes solidity
Plywood -symbolizes the different layers in it
Wood glue
Feviquick
Nails- symbolizes pain, irritation, discomfort
Also used for joining all the parts of the wearable.
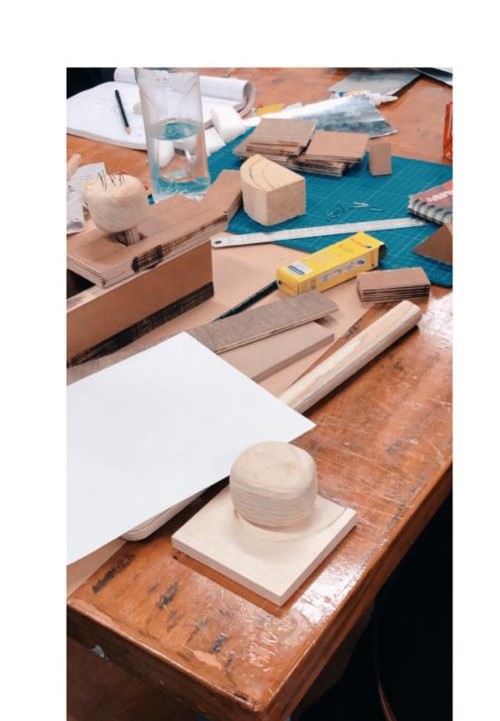
images of materials and machines used to work for the same

- TECHNIQUES:
Techniques used to cut and shape every piece of wood and ply wood was by using the machines in the wood lab, the technique used join all the parts together was by hammering nails, nails joint and the technique used for the working of the model was hinge joint.
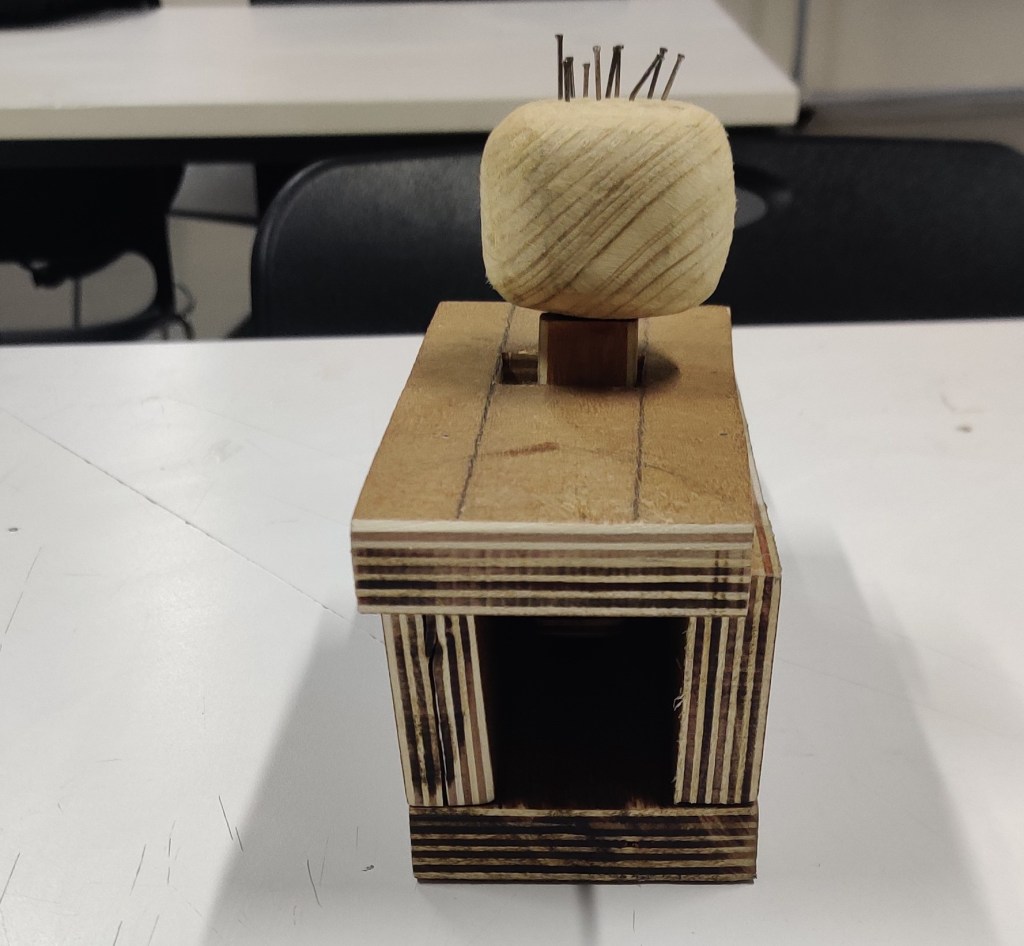
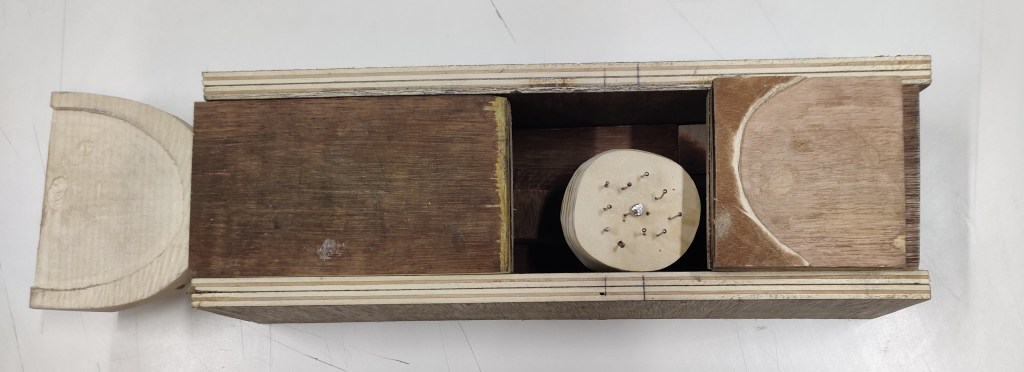
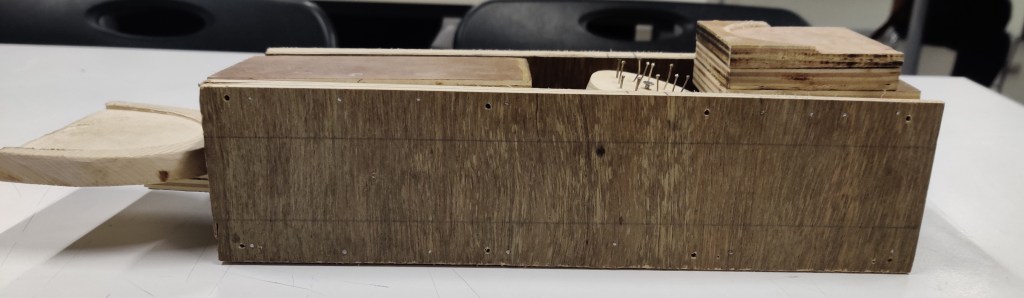
- MEANING TO EVERY PART OF THE WORKING WEARABLE :
- Peddle- worked as a wearable for the person who is accidentally stepping. The main mart of the working process of the model.
- The box- the box was made of plywood denoting every layer it as just like a shoe has.
- The ball with nails – expressing the emotions, and depicting penetration of discomfort, pain , irritation and inconvenience.
- The second carved block – it is for the placement of the shoe which has been stepped upon , denoting the second person in this interaction.

Experience and learning:
We faced a lot of hurdles while making our working wearable as there were issues in the make and break, , there were issues with joining the parts efficiently, there were obstacles due to the size and measurements of the model which caused trouble in the movement of our working wearable.
Although the learning was a fun process. I learned so much about materials , about measurements, I could understand better through technical drawings.
I have improvised in all my carpentry skills, I have learnt to use all the wood tools and machines well , I have understood as to how wood or plywood is purchased all in all it was a great experience and learning for me.
Complete process work to complete documentation gallery: